Getting Started
This walkthrough takes an empty level and ends with a minion that gathers wood
on command. The plugin ships a demo project with everything below already built
(BP_Minion, BP_Tree, BP_Player, DA_Assignment_Definitions); use it as a
reference while you wire up your own.
1. Enable the plugin
Section titled “1. Enable the plugin”Enable ResourceGatherer in Edit → Plugins, then restart the editor if prompted.
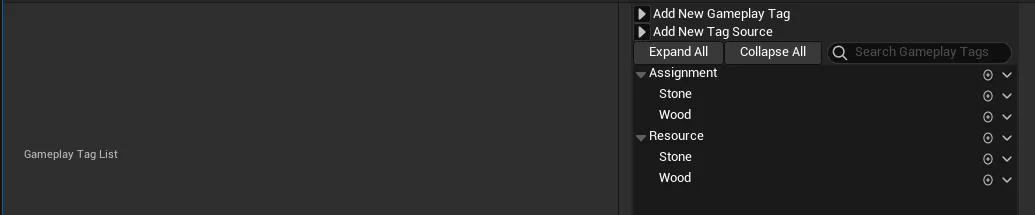
2. Add the Gameplay Tags
Section titled “2. Add the Gameplay Tags”Orders and resources are paired by Gameplay Tags. The plugin ships with
Assignment.Wood, Assignment.Stone, Resource.Wood, and Resource.Stone.
To add your own, go to Project Settings → Project → GameplayTags → Manage
Gameplay Tags and create a matching pair:
| Tag | Used for |
| --- | --- |
| Assignment.<Task> | The order you hand a minion (for example Assignment.Wood). |
| Resource.<Type> | The resource an actor provides (for example Resource.Wood). |
The convention is one Assignment.* tag per task and one Resource.* tag per
resource type. You will pair them in step 7.
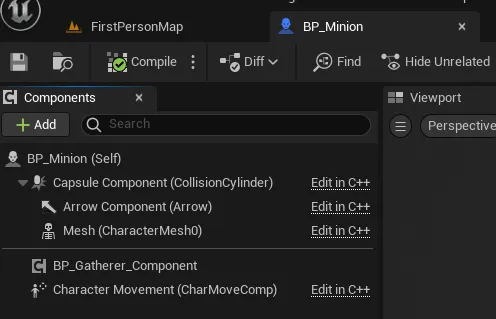
3. Build a gatherer minion
Section titled “3. Build a gatherer minion”-
Create a Character Blueprint for your minion (the demo’s is
BP_Minion). -
Add Component → Gatherer Component (or the demo’s
BP_Gatherer_Componentsubclass). -
On the Gatherer Component, set:
- Available Assignments Data Asset → your Assignment Definitions asset (you create this in step 7; leave it for now and come back).
- Resource Search Radius → how far from home the minion looks for work.
Defaults to
2500units.
-
Set the character’s AI Controller Class to
AIController(or your own). The minion is driven by a Behavior Tree, which needs an AI controller. -
On the character’s Capsule Component, enable Generate Overlap Events. The minion detects a resource by overlapping it with its capsule, so this must be on.

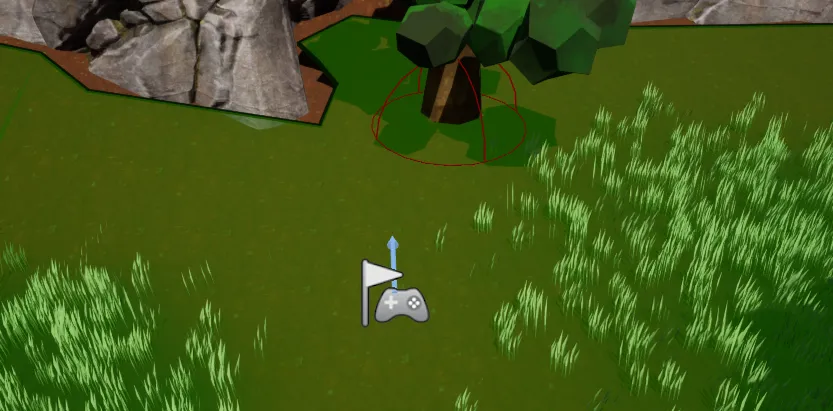
4. Lay down a NavMesh
Section titled “4. Lay down a NavMesh”Drag a NavMeshBoundsVolume into the level and scale it to cover the play area. Press P to visualize the navigation mesh and confirm it reaches both the minion and the resources; the minion ignores any resource it cannot navigate to.

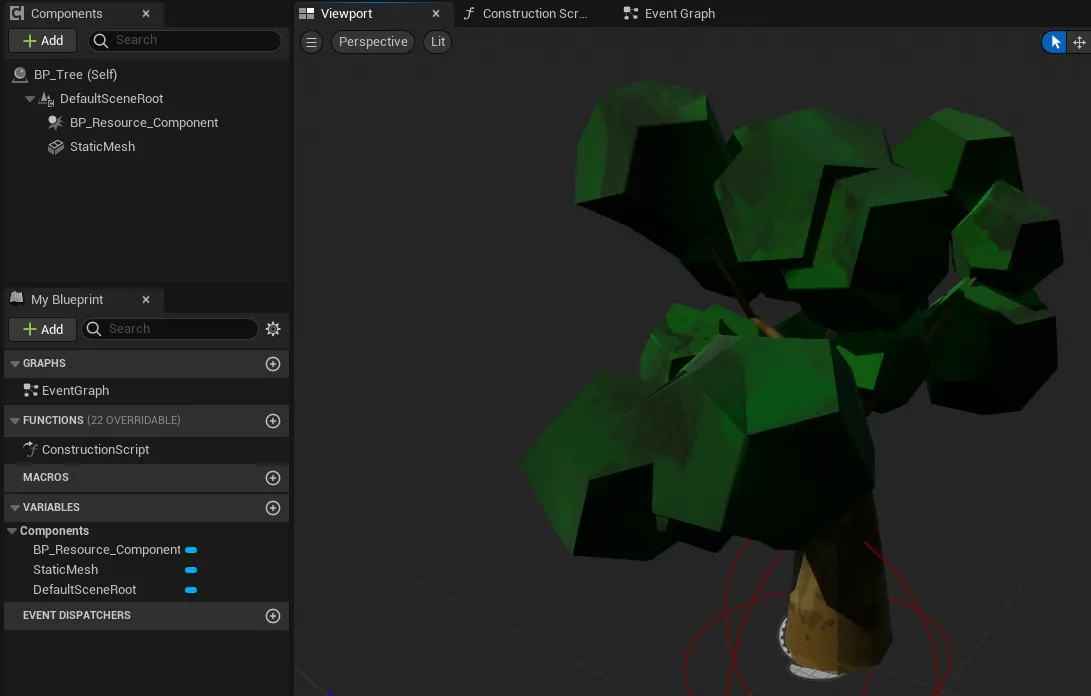
5. Make a resource actor
Section titled “5. Make a resource actor”This is the thing in the world that gets harvested (a tree, a rock).
-
Create an Actor Blueprint (the demo’s is
BP_Tree) and add your static mesh. -
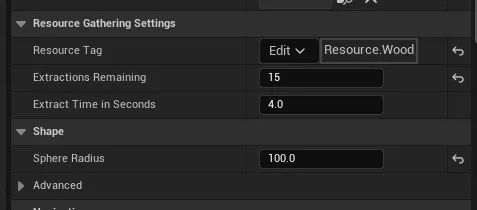
Add Component → Resource Component. This component is a sphere collision, so it doubles as the extraction trigger volume. Size its radius larger than the mesh so the minion’s capsule can overlap it.
-
On the Resource Component, set:
| Property | Meaning | Example | | --- | --- | --- | | Resource Tag | What this actor provides. |
Resource.Wood| | Extractions Remaining | How many harvests before it is used up. |3| | Extract Time In Seconds | How long one harvest takes. |4| -
Set the sphere’s Collision so it generates overlaps with the Pawn channel (for example
OverlapAllDynamic, or a custom profile with Pawn: Overlap). -
On the actor itself, enable Replicates. The Resource Component replicates
Extractions Remainingand removes the actor when it hits0; without replication, clients never see it disappear.

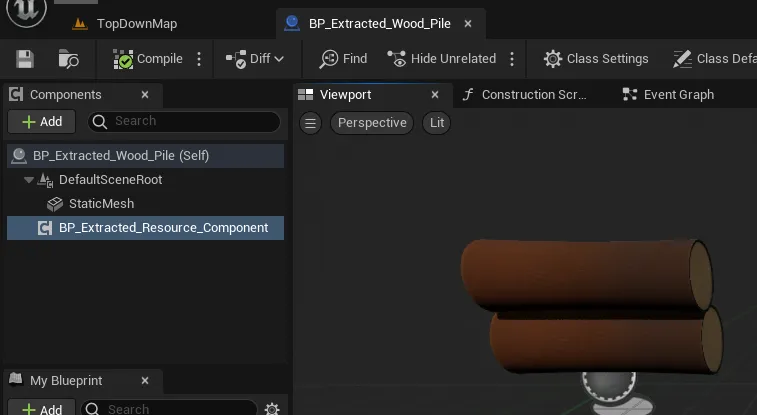
6. Make the carried resource (and add a socket)
Section titled “6. Make the carried resource (and add a socket)”This is the actor that spawns into the minion’s hand and gets hauled home.
-
Create an Actor Blueprint (the demo’s is
BP_Extracted_Wood_Pile) and add the static mesh you want carried. -
Add Component → Extracted Resource Component. This makes the actor settle correctly when it is dropped on the home pile.
-
Make sure the carried mesh’s collision will not fight the minion while it is attached: set it to NoCollision while carried, or use a query-only profile that ignores the Pawn channel.
-
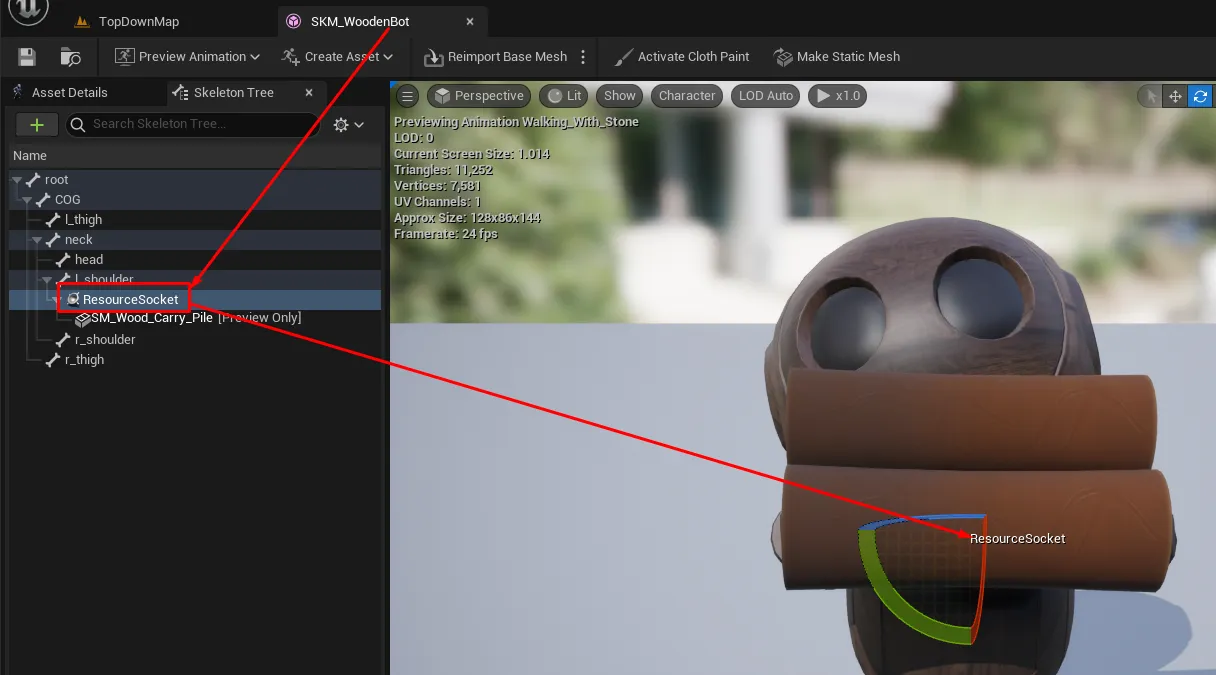
Open your minion’s skeletal mesh and add a socket on the hand where the resource should sit. You can add a different socket per resource type and choose which order uses which in the next step.

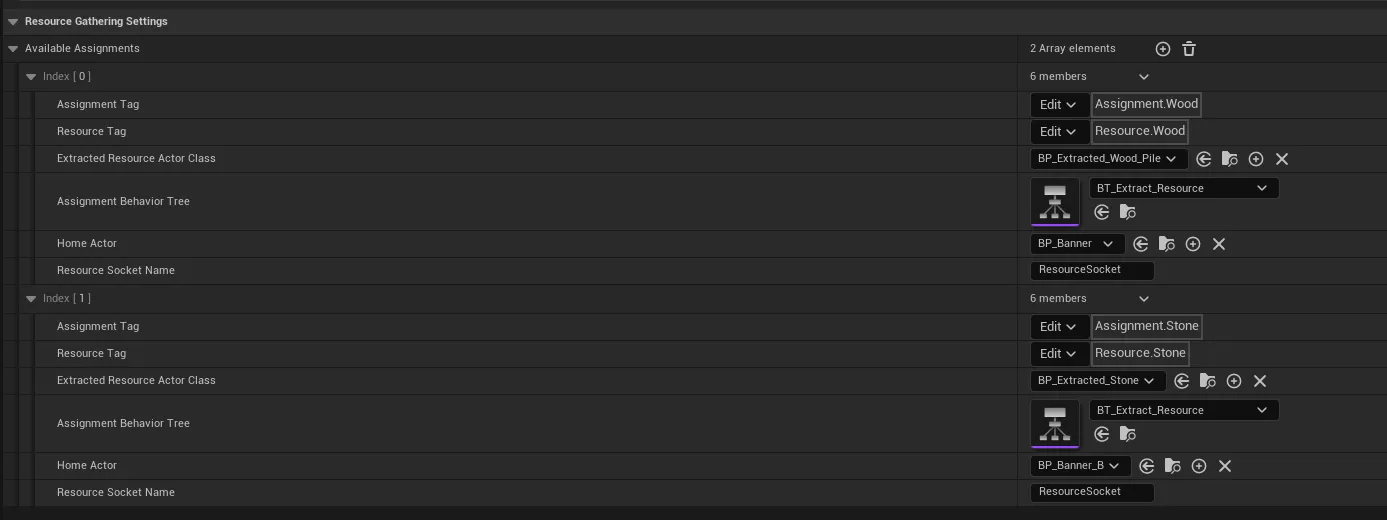
7. Define the assignments
Section titled “7. Define the assignments”This is the data asset that ties everything together.
-
Create an Assignment Definitions Data Asset (the demo’s is
DA_Assignment_Definitions), then assign it back on your minion’s Gatherer Component (step 3). -
Under Available Assignments, add one entry per order:
| Field | What to set | | --- | --- | | Assignment Tag | The order tag, e.g.
Assignment.Wood. | | Resource Tag | What it harvests, e.g.Resource.Wood. | | Extracted Resource Actor Class | Your carried actor from step 6. | | Assignment Behavior Tree |BT_Extract_Resource(the included loop). | | Home Actor (optional) | An actor to mark the drop-off, e.g. a banner. | | Resource Socket Name | The hand socket name from step 6. |
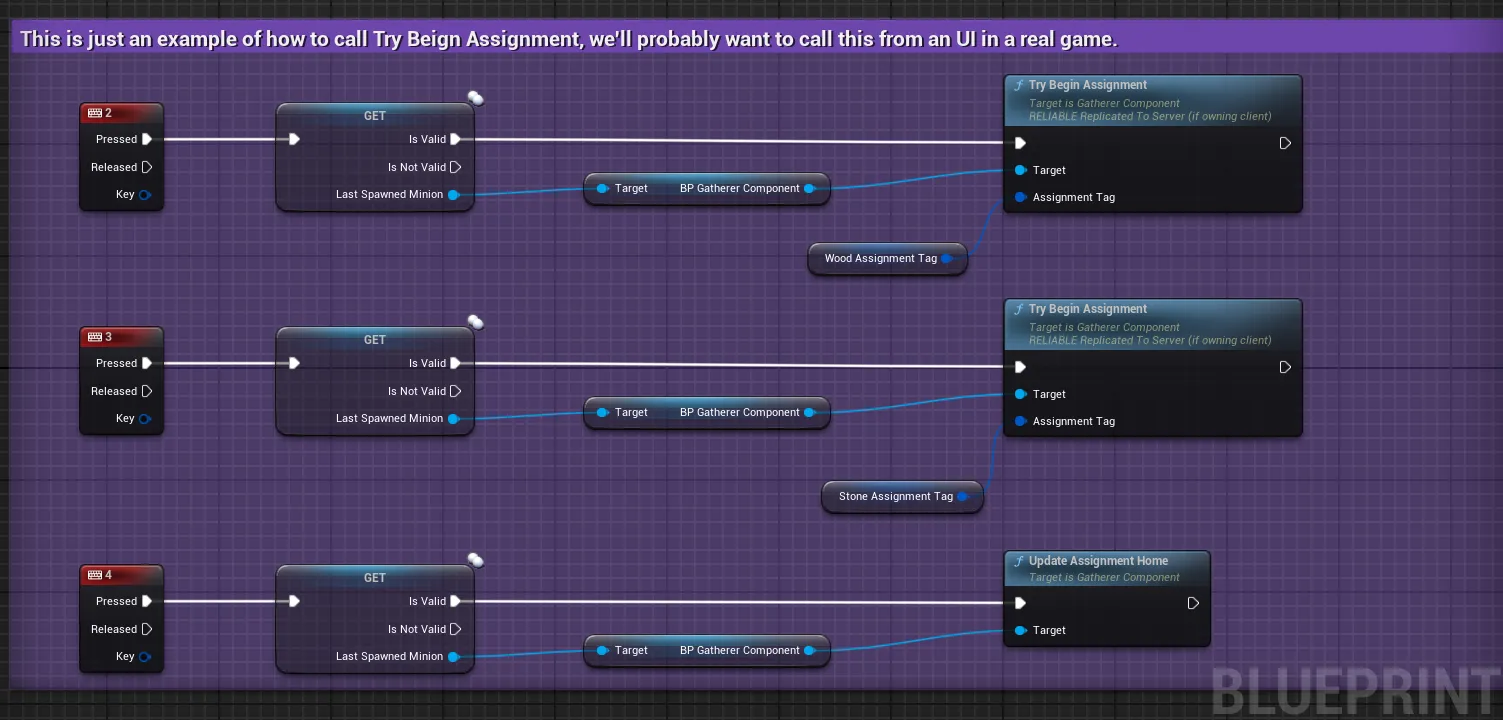
8. Give an order
Section titled “8. Give an order”With everything wired up, hand the minion an assignment from your player or
controller logic (the demo does this in BP_Player):
-
Get the minion’s Gatherer Component and call Try Begin Assignment.
-
Pass the Assignment Tag (
Assignment.Wood) and a Home Location. Pass(0, 0, 0)for the home location to auto-detect it from the ground under the minion’s feet, or pass a world location to set the drop-off explicitly.
The minion now finds the nearest wood, walks to it, harvests it, carries the result back to its home location, and drops it on the pile, then repeats.
Next: the full Gatherer Component reference, or read Multiplayer & Replication before you ship a networked build.